Well, it's FINALLY done! You know a post has taken entirely too long to get up when you can watch the seasons change with the photos but a chicken coop is DONE and that's all that matters, right?
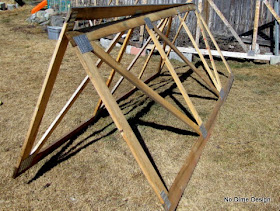
I started out with two of these guys:
They are sides from a boat crate. I leaned them together to see about how big this whole thing would be. Big enough, Check!
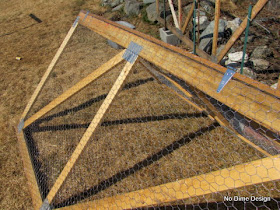
Then we got to work on the chicken wire.
It was pretty simple, just stretch and staple. We only did it over the first two sections since the third is going to be covered by some left over bead board.
All done.
The next day I set it up and used hinges to attache the two boards together.
Nothing super strong but it get's the job done.
Next I cut two pieces of bead board for the back to give the chickens some shelter.
To sturdy things up a bit I cut 2 boards to go along the bottom. I Just held the boards up to the wood to mark my cut.
I used 2 little brackets on each end to make sure they were good and on there.
My littel helper had a blast handing me things and helping me measure. It helped her for get about the scab on her little nose form falling in the driveway :/
Next we added a board on each side of the coop.
Nothing fancy, just a left over piece of wood and a couple of screws.
They made a support for another spare board so the chickens have a nice little landing.
Then Anberlynn and I git busy with some more bead board. Again I just held it up to find my cuts.
We cut it into 3 sections and laid out our hard ware.
The top and bottom sections are attached to the coop. The middle has hinges and a lock so we can get in and out when they finally start laying eggs.
I added a spare piece of board and stapled some "rungs" on made from spare slices of wood.
This is how we were looking for the time being. We let the chicks out in it during the day and they had a blast!
We used a handy dandy sign the says something about "Big Bob's Flooring Outlet" as a door fro a while.
They didn't seem to mind. Eventually I got around to spray painting and I let he hubby handle the hard stuff.
He measured the sides of the coop and pulled out the miter box.
He made 3 supports making the door just about the sturdiest thing on our little coop.
While we were working the chickens were on the loose, free to roam the back yard, stretch their little wings as far as they could go...
With a few naps in between.
Don't they look like they are posing for a cheesy boy band cd cover?
Here's their mafia look.
But on the inside their really just little cuttle bugs.
So say my daughters.
My husband must know their sweet spot because they look like this just about every time he holds them.
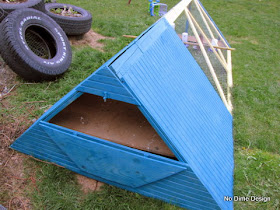
And here it is! Finished!
I chose teal and yellow because that's what I had on hand- then it ended up not being enough, then they didn't have the same exact colors...you know how it goes.
And here's the back door open. We have since added bedding and threw in an old broom stick too but they still prefer the grass.
Well, there it is. They like it. We like it. But we'll have to see how it goes when it comes to winter.


No comments:
Post a Comment